Etsy store

Thursday, November 1, 2018

Hygge Blanket Resurrection


So Mom... don't freak out but...

When my daughter went off to college last year she wanted a big chunky Hygge blanket for her dorm room. A blanket that looked like this...

(not my photo)

After some research I found that the original blanket seemed to have originated somewhere in Russia and was made with Merino wool roving, arm knitted into a big chunky blanket. While it all looked wonderful, I had a couple issues. One, they cost about $500. Not kidding! Second, I really had doubts about how well a blanket made of wool roving would fare in a college dorm room. Not only was it NOT machine washable but it would fuzz.

My compromise was to make one out of chunky acrylic yarn. We also wanted a blanket larger than an arm knit size one so I found instructions where a larger blanket could be made by using PVC pipe as knitting needles instead of your arms. Hence, last summer, I settled on the floor with two five foot sections of PVC pipe and proceeded to knit a big chunky blanket for my daughter. She happily took it to school with her in August and told me she and her friends loved it because it was warm and big and stretchy - big enough for four kids to wrap up under at once while watching TV.

Several months later though, she broke the news...
Apparently the big stretchy blanket was hanging off the edge of her lofted bed when it came in contact with a candle and caught on fire. Thankfully the flames were immediately stomped out and the dorm didn't go up in flames and I didn't receive a call saying my kid was getting kicked out for having a candle in her room... Arghh, the things you find out about months after the fact...

Anyway, my daughter did have the sense to keep what was left of the blanket rather than trash the remains as she had a sense of how much the thing cost. Big yarn is not cheap and I used 10 skeins of yarn to make her blanket... and she knew it. Darn good decision on her part as it definitely made me less mad once she delivered the news.

Since then, the blanket remains had been in my "to do" pile.

Recently though I discovered instructions (HERE) on finger knitting with big yarn. The concept is very similar to "knitting" with the loopy yarn that has now hit the stores... except it's done with regular yarn. This weekend I decided it was time.


I took the burned blanket apart, cutting away the charred yarn and tying loose ends together. The nice thing about chunky yarn is that it hides knots fairly well.


This was the yarn I was able to salvage. I put a roll of cake yarn in the picture so you could get a sense of the volume of yarn. Quite honestly, it took me longer to take the blanket apart than to finger knit it back together. Two days to take it apart. Two hours to finger knit it back together!

Finger knitting on the floor = instant gratification!


Done!
 
Finger knitting also allowed me to make the blanket a bit denser than the original. What I lost was the evenness of the stitches as I had to eyeball the loops, but overall I was really pleased with the results.


Ta dah!
 
Shhhh.... I'm wrapping this puppy up and giving it back to my daughter for Christmas!

Monday, September 3, 2018

Pawprints Over the Rainbow Bridge Afghan

Perhaps it's only fitting that I finished this afghan on Labor Day.

Sometimes it's the project that finds you. I wasn't looking for another afghan project. Lord knows I have too many unfinished projects already. But this one spoke to me...

We spent Memorial Day at my sister-in-law's house. It was a relaxing day spent mainly eating and talking while watching my nieces, my husband, and my father-in-law build a pen for my sister-in-law's peacocks... which is another whole story... and we played with her dogs.

This is in memory of Oscar.

Oscar was a scruffy little dog that my sister-in-law's wife found walking in the middle of Highway 50. They adopted him and he was a lovable little dog that liked to cuddle and be scratched. G spent quite a bit of time with him that day and joked about taking him home with us.


Oscar and G, Memorial Day 2018
 
Four days later, Oscar and another one of my sister-in-law's dogs Thor, tragically and unexpectedly passed away. Then, that weekend, this pattern showed up on my Pinterest feed...
 
"Meandering Pawprints Over the Rainbow Bridge"
a pattern by Amy Brewer and Doug Speeckaert
 
 
Perhaps it was the rainbow of colors of the hammock in my photos that matched so well with the colors of the afghan that grabbed my attention. Perhaps it was the "Rainbow Bridge" poem that had played in my mind since the dogs' passing. In any case I had to make this afghan!
 
The original pattern can be found HERE.

I wanted my afghan to have a muted rainbow of colors that gradually changed from one to the other. I really could not find that gradual change I was looking for, but settled on the Lionbrand Cupcake yarn in the "Jellybean" color as it had the muted rainbow colors I wanted.


I then played around with the number of pattern repeats to get the blanket panel I wanted. After three tries, I settled on crocheting four pattern repeats, making my panel 80 stitches wide.

If I had made the blanket as one solid piece it would have been so wide that the color strips would be very narrow. I wanted the color strips to be wide enough so I could crochet a cake of yarn, first from the outside in, starting with brown to represent the earth then ending in blue to represent the sky, and then be able to join the next cake of yarn from the inner blue to the outer brown, thus going back down from the sky to the earth like the arc of a rainbow, and have it long enough for an adult sized blanket.

I crocheted three panels to get the width I wanted. I used a 4.25 mm crochet hook to get the stitch definition and drape I wanted. I used a skein of Caron Simply Soft "Chocolate" yarn to edge and join the panels.

Blanket is 62" wide and 58" long

The colors didn't change as gradually as I wanted but it was the color scheme I wanted


Due to the nature of the cake yarn, each cake of yarn had slightly different hues of color and the length of each color strip was slightly different too. I could have cut the yarn at the end of every couple rows so the colors matched up on each panel but I decided to make each panel unique as I felt each panel represented a unique path across the rainbow bridge.

I finished the afghan today, Labor Day. I'll remember this afghan as my 2018 summer project that jumped into my lap.


The Rainbow Bridge

Just this side of heaven is a place called Rainbow Bridge.
 
When an animal dies that has been especially close to someone here,
 that pet goes to Rainbow Bridge.
There are meadows and hills for all of our special friends
 so they can run and play together.
There is plenty of food, water and sunshine, and our friends
 are warm and comfortable.
 
All the animals who had been ill and old
 are restored to health and vigor.
Those who were hurt or maimed
are made whole and strong again,
just as we remember them in our dreams
of days and times gone by.
The animals are happy and content,
except for one small thing;
they each miss someone very special to them,
who had to be left behind.
 
They all run and play together, but the day comes when
 one suddenly stops and looks into the distance.
 His bright eyes are intent. His eager body quivers.
Suddenly he begins to run from the group,
 flying over the green grass, his legs carrying him faster and faster.
 
You have been spotted, and when you and your special friend
finally meet, you cling together in joyous reunion,
never to be parted again.
 The happy kisses rain upon your face;
 your hands again caress the beloved head,
 and you look once more into the trusting eyes of your pet,
 so long gone from your life but never absent from your heart.
Then you cross Rainbow Bridge together.
 
Author unknown
 

Tuesday, July 10, 2018

Dogs and Daisies Afghan


My Dogs and Daisies afghan found a forever home this weekend and I am overjoyed!

I made this afghan years ago almost by accident. My girls were young at that time and I purchased an afghan pattern book of animal motifs. The real reason I purchased the book was because there was a teddy bear afghan in it that I thought I'd make for the girls. There were numerous other cute patterns in it too like turtles and frogs, however this dogs and daisies pattern really caught my eye and I started making it instead of the bears.

The girls shared a room and had bunk beds at that time. My vision was to crochet matching colorful animal afghans for them for their beds.

I started the afghan, but as always, life got in the way. This was during a period of time where I made one afghan every year as a Christmas gift for my adult nieces. At Christmas I would let one of them pick out the afghan they wanted from the pattern books I had, then I would crochet it for them for their Christmas gift the following year. I did this for three years in a row for two nieces and my sister-in-law. I always had the afghan done by the middle of the summer so I could enter it in the County Fair before giving it to them for Christmas. Each of the first two afghans I made took First Place in the crocheted afghan category their respective years.

Needless to say, my Dogs and Daises afghan appeared doomed to be another UFO, as in UnFinished Object. The third year though, my sister-in-law picked out the same afghan pattern that one of her daughters had chosen previously. Not wanting to enter the same afghan pattern in the Fair twice, I got motivated and finished the Dogs and Daisies afghan.

This was the second motif afghan I had ever crocheted. The first one, in my opinion, was quite a disaster. The main issue is that it's quite difficult to get everything to line up nice and neat and square unless each and every motif is exactly the same size, meaning your stitching has to be very nice and even. I had come to believe that a motif type afghan could never win at the Fair for this very reason. It's just very hard to make a motif type afghan nice and neat and square!

I entered my afghan mainly because it was DONE. I was pleasantly surprised when it took First Place!


By now though, my girls were older and had moved into their own separate bedrooms and had their own decorating styles... and this afghan did not fit any of their tastes. So, like many of my competition pieces, the afghan went into a storage container.

Several weeks ago I decided it was time to find this afghan a home. Some place where it could see the light of day and be appreciated. I have taken to selling my pieces. I do so because I feel that sometimes when I give things away or gift them the recipient may not be so thrilled to receive the item. Hand made things are not everyone's cup of tea. I want to find people who appreciate what I've made and I know that they really truly want it if they are willing to pay for it. My plan was to list this on my Etsy site... but I found a buyer before it was even listed. Happy happy day!


Hopefully there is a little girl out there that loves her new blanket!


Thursday, June 28, 2018

Faux Chenille Quilts - A Tale of Two Blankets


I discovered Faux Chenille Quilts one day down the Pinterest rabbit hole -  you know, that rabbit hole you get sucked into when you open up Pinterest to look up something you've saved. Next thing you know you're inundated with shiny things on the opening page so you click on "just one" link, then hours later you can't remember why you opened up your Pinterest page in the first place!

I saw this post (linked HERE) "Sewing:Heirloom Cut Chenille Baby Blanket" from the Aesthetic Nest, and I had the sudden urge to make something I'd never even heard of before. Several things contributed to the urge. First, one of my co-workers had just had a baby. I will usually gift a crocheted baby blanket when one of my friends has their first child. I hadn't been crocheting lately though so I didn't have a blanket... but this looked perfect! Then, I found that flannel was on sale at my local fabric store. That sealed it. I was going to make a cut chenille blanket.

I love making baby blankets. My baby blankets tend to be sturdy weighty things. Light lacy blankets are beautiful to look at but fingers and toes tend to stick out through the holes and, well, they just don't seem practical. My signature blankets are stroller blankets. Good size blankets with some weight to snuggle your baby in when you go out in the autumn air. Or, in summer, something that you can unfurl on the ground. These blankets seemed right up my alley. They could be used as play mats. Babies like the textured feel of the chenille. Apparently autistic kids like them too and they are sold as "sensory blankets." I had to make one.

The instructions were simple enough. What took time was quilting all the layers together. I think the most difficult decision I had to make was what fabric pattern to buy. So many choices and color combinations!

Materials Needed
1.25 yards cotton print fabric
(4) 1.25 yard lengths of coordinating flannel fabric
matching thread
5+ yards of matching bias

I came up with 1.25 yards because my material was 44 inches wide and I wanted make the biggest possible square with my fabric. My blanket was for a little boy so I settled on a colorful dinosaur print fabric, then got flannel in yellow, orange, and blue to match the print fabric.

There will be one layer of flannel right next to the print fabric that acts as a backing and doesn't get cut. The other flannel layers get cut. I decided to use the same color flannel for the backing layer as well as the first layer but that is personal preference. You can also use more or less layers depending on how full you want your final product. I saw several blankets with just 3 layers - one backing layer and two cut layers - but I wanted mine fuller and went with four.

Make a fabric sandwich by first placing your print fabric wrong side up on your table, then layer your flannel fabric on top. Pin all of it together when your done. Flip it over and you should now be looking at the right side of the print fabric.

Now is the time consuming part...

Mark a 45 degree diagonal line from corner to corner (or close) on the right side of the fabric. I folded a newspaper to get a 45 degree angle then put one of the straight edges along one of the blanket edges then ran a piece of painter's tape for my line. You can also mark it  with a fabric pencil. I used tape because my fabric was dark and I wanted something really easy to follow.

Now sew down your line.

I HIGHLY recommend using a walking foot on your sewing machine to do this. A walking foot grabs your fabric from both the top and the bottom so it feeds evenly through the machine. I had never used a walking foot before. It changed my life!!!

Seriously. Years and years ago I wanted to make quilts. I'd pierce the tops but then all the material would bunch and pucker when I tried to quilt together the top with the batting and the backing. No one told me I needed a walking foot. I got so frustrated I never finished those quilts. I still have them in storage crates though... so that may be another story!

Back to our blanket. So sew down your line. Now proceed to sew more parallel lines a half-inch apart until the whole blanket is quilted.

sewing, sewing, sewing...


I found that there is some shift in the layers as you sew so once you get the whole blanket quilted go ahead and trim your edges so everything is nice and straight and square.

Trimmed to a nice square

All quilted!


Now flip the blanket over to the flannel side and cut through the top 3 layers of flannel. You are cutting a slit in the flannel between the sewn lines. Do not cut the flannel that is right next to the printed fabric.

cutting, cutting, cutting

All cut!


After all the flannel is cut, bind the blanket with bias tape so you are sewing down the cut edges all around the blanket.


All done sewing!

Now for the fun part. It's a hold-your-breath moment the first time you do it.

Throw your blanket in the washing machine with a bit of detergent and wash it... and dry it... and wash it... and dry it. It's suppose to get fluffier the more you wash and dry it. Definitely wash and dry the blanket by itself unless you want lint on everything else.

Ta Dah!!

Faux Chenille. SO fluffy!

Before washing

After washing

Folded and ready to gift

Sturdy enough to cradle a newborn

… and worked well as a play mat too!

Well...  after that I was dying to make more! 

Dreams of making them for my Etsy store filled my head. Then, one of my friends placed a custom order for an adult size blanket. Adult size as in big enough to cover a queen size bed. Not one to back down from a challenge, I jumped at the opportunity.

I love to do custom orders. What more could a crafter want?! With custom orders I will quote the actual material cost then charge something for my time to put it all together. The person placing the order gets exactly what they want and I get to do something I love with someone else paying for the materials I get to play with. Any "profit" I make I use to buy more craft materials for myself . My end goal would be to have a self-sustaining hobby. I'm certainly not charging enough to make a living but I'm doing what I love.

First I perused the fabric store and sent her photos of a couple of fabric choices that suited her color and pattern preferences. This is what we settled on...

Pictured here is 5 yards of print fabric and 20 yards of flannel.
Luckily the flannel was still on sale!

One of the challenges to making a larger blanket was stuffing all that material through the throat of the sewing machine (the space on the right side). I found this post (linked HERE) "Queen Sized Faux Chenille Quilt - Tutorial" from Making Things Is Awesome that showed a queen size quilt made with a regular sewing machine so I knew it was possible. Rolling the material helped but it was 5 layers of fabric and rather heavy. I then spent SEVERAL days stuffing all that material through my sewing machine to get it all quilted. My arms got quite the workout.

Sewing...

Sewing...

Sewing...

Somehow there was something addicting about quilting row after row of lines. I just couldn't stop!

Done!

Quite honestly, I'm in LOVE with this fabric

Once it was all quilted I put it on a queen size bed to check the sizing. 


Another challenge to making a larger faux chenille blanket was that it required more than one width of material. Since all of my material was 44 inches wide I put two 2.5 yard sections of material side by side and sewed it together. The actual quilt is shorter than 90 inches because I had to shift the two sections up and down a bit so the pattern matched up perfectly.

Next came the cutting. I decided to try using a chenille cutter as my hands started aching and cramping when I used my scissors for long periods of time. The chenille cutter is a tool that is suppose to rip through the fabric with the greatest of ease and reduce your cutting time significantly. I bought a Fiskers brand chenille cutter and tried it out. It wouldn't even may a DENT in the three layers of flannel I was trying to cut. I had to return it. I ended up buying some spring loaded scissors that I saw one of the women at the fabric store use at the cutting counter. They worked wonderfully and didn't hurt my hands.

I purchased another half yard of the print material to make my own binding. This was born out of necessity as I actually tried to buy matching bias tape but I needed 10 packages and 1) none of the stores stocked 10 packages, and 2) if I special ordered them from the store I'd have to pay full rip retail which amounted to $30! The half yard of material cost me $2.50. I loved how the binding turned out and will be making my own binding from now on. 

Next it was wash, dry, and hold your breath time!
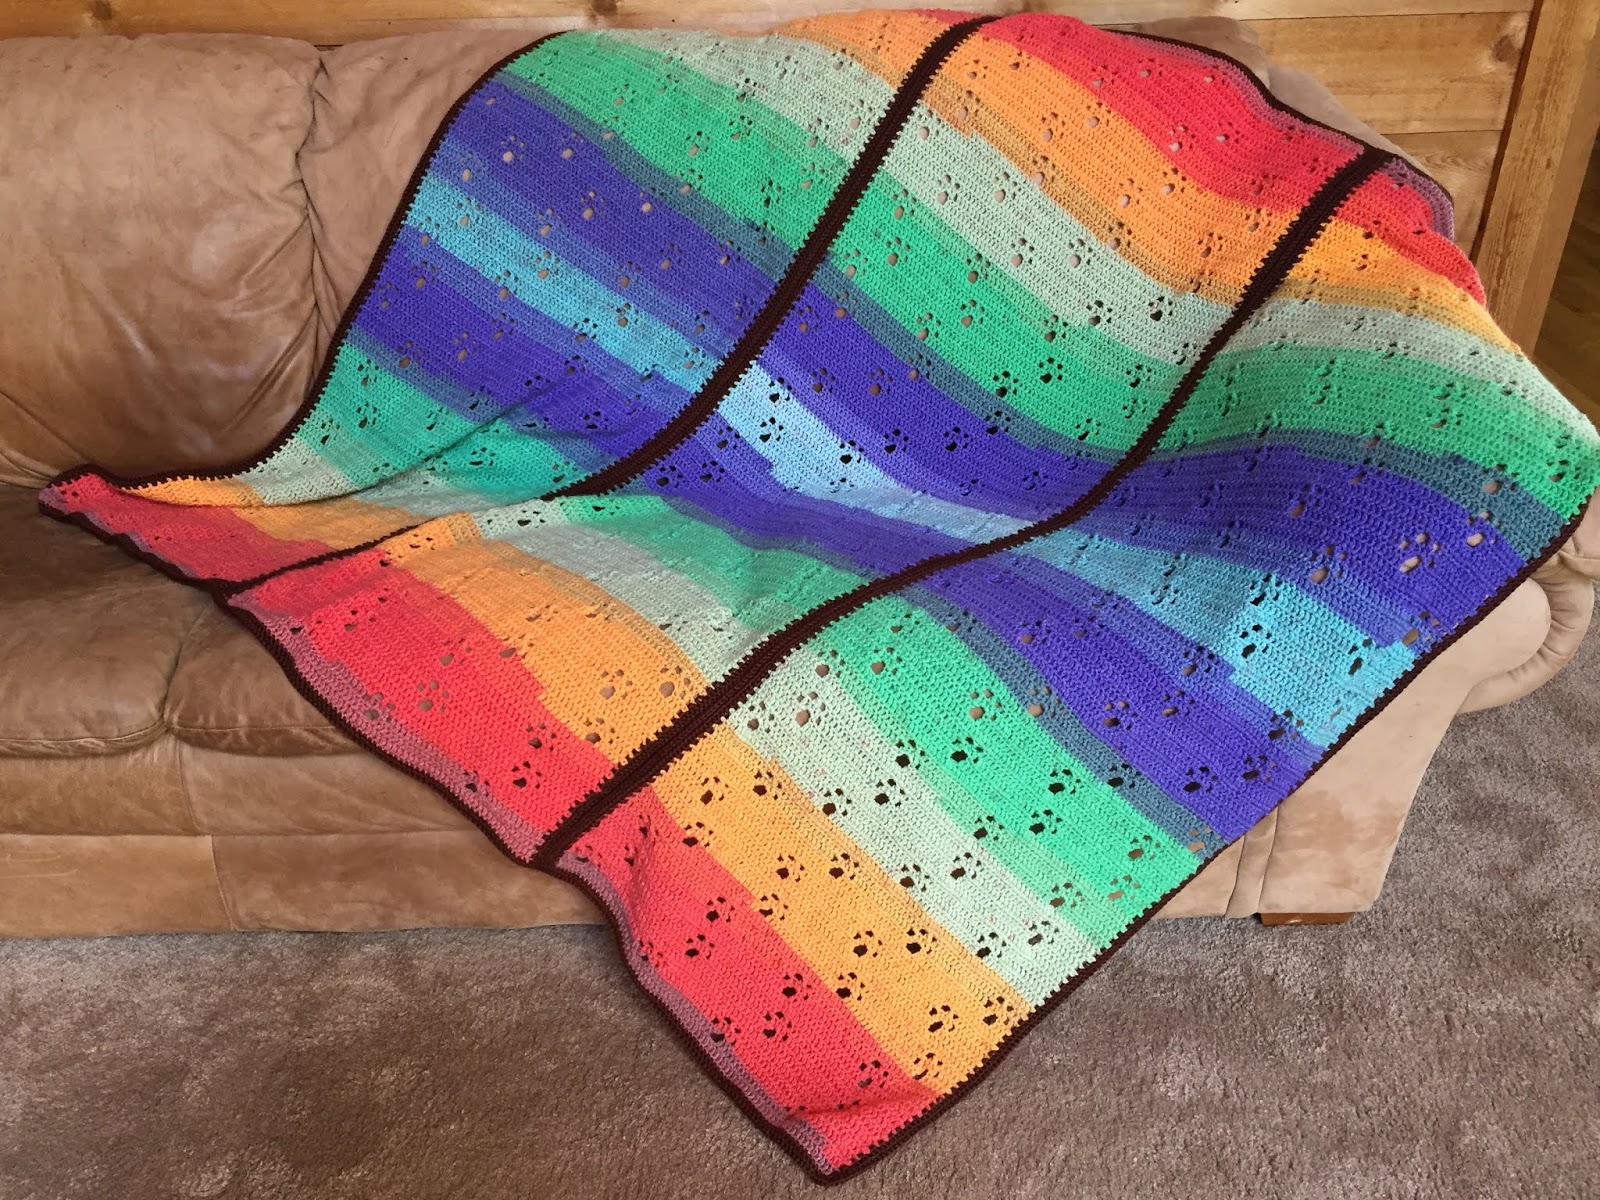
Voila!


I LOVE these colors!


I also loved the heft of this blanket. It ended up weighing 8.5 lbs! Looks like I need to make one for myself once my arms recover.

My finished product.
A little sad to see it go!

I really liked how the homemade binding turned out


But wait!

Looky what I found!

This photo doesn't so the fabric justice. The depth of that red is incredible!


This beautiful fabric caught my eye. It was on the clearance rack. I had visions of making my own king size faux chenille quilt out of it. But alas, there wasn't enough material left on the bolt. Sigh. The material was so pretty though I had to buy some of it. I bought enough to make another baby blanket. 


This will go in my Etsy store when I'm done and hopefully someone will be just as thrilled as I am to find it!


.